FANPRO / AI IMAGE EDITOR

Keep the image you like. Direct the change it needs.

A new background. Softer light. A different jacket. Start from an existing influencer image and give the next version a focused brief.

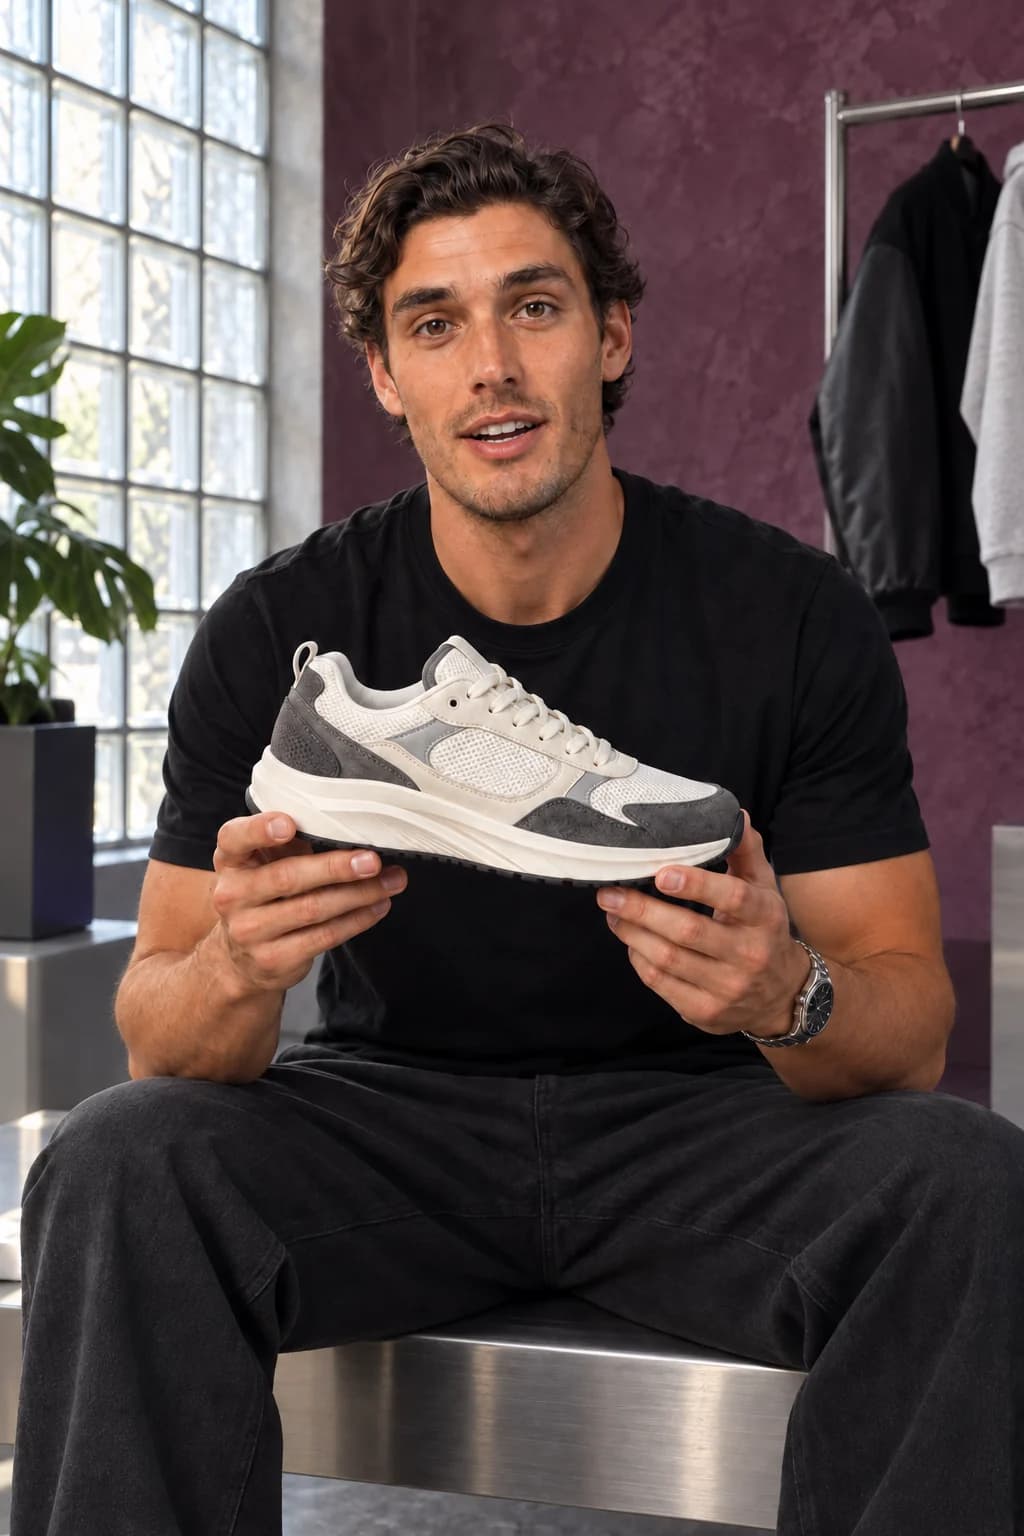
Male AI streetwear influencer holding a sneaker against an edited plum studio wall
IMAGE EDIT / A FOCUSED BACKGROUND CHANGEAI-generated concept image

An AI image editor uses an existing image and written instructions to generate a revised image. FanPro’s Edit Image workflow lets you supply reference imagery and describe your change. Review both the requested edit and the details you wanted to keep.

A CONTROLLED EDIT STUDY

Change the setting. Inspect everything else.

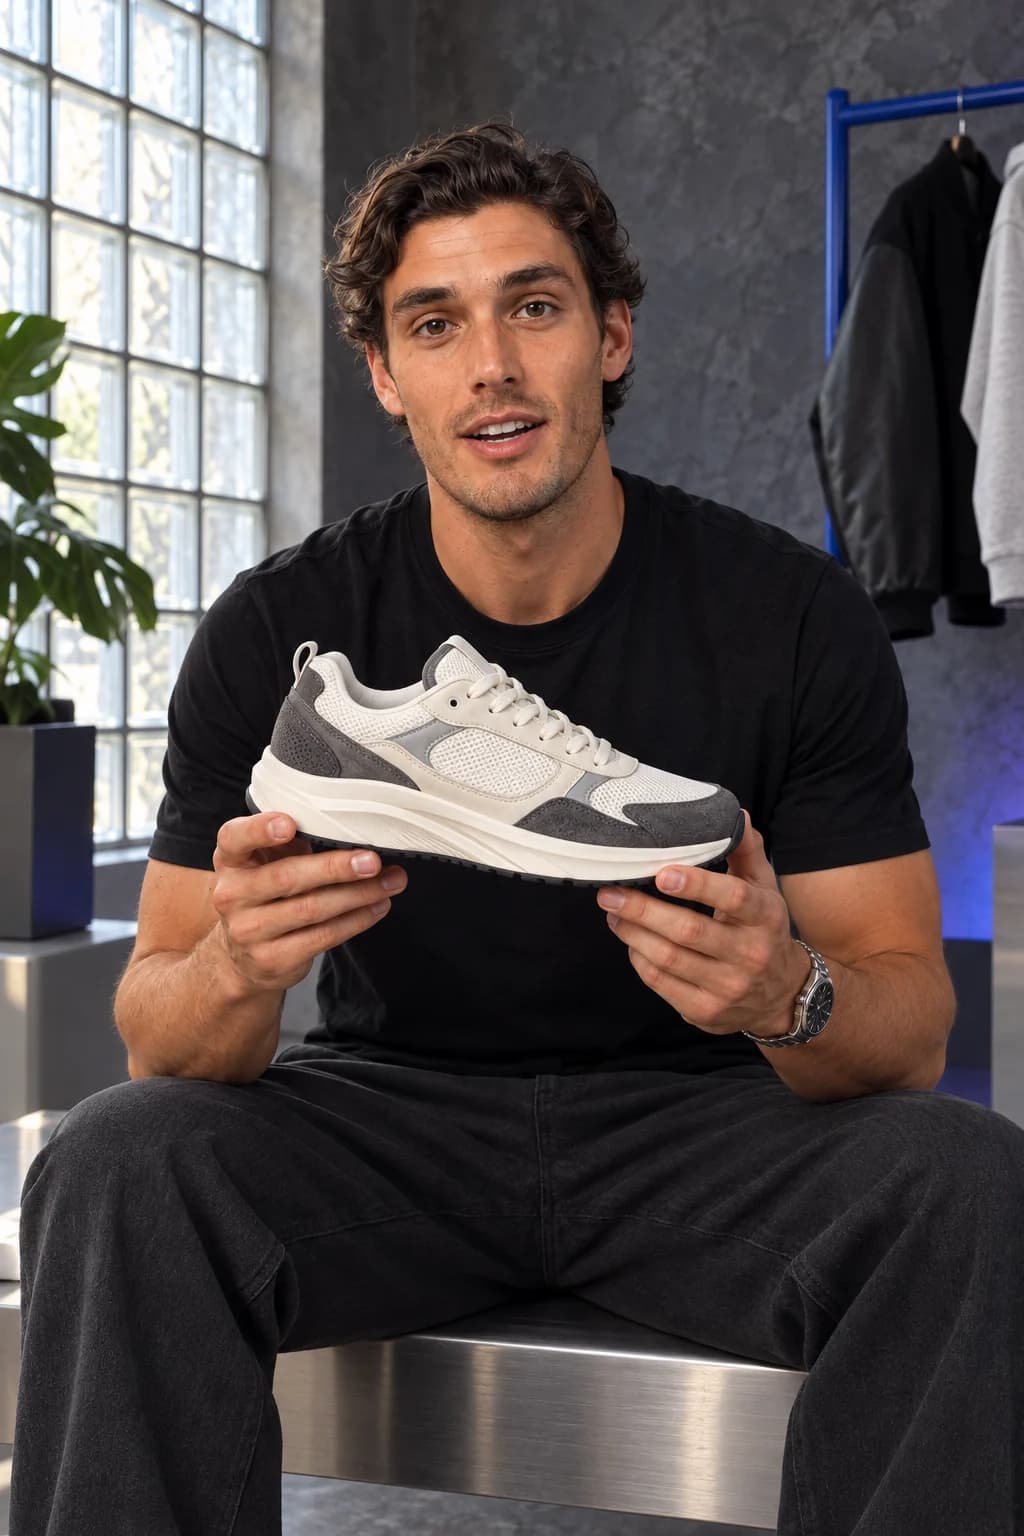
Compare the original streetwear concept with an illustrative background edit. The request changes the wall and rail finish while asking to retain the influencer, product, pose and light.

Source image: male influencer and sneaker in front of a charcoal wall and cobalt clothing rail
01

The source image.

Choose a source where the face, hands and product are already clear. Here the charcoal wall and cobalt rail are the intended edit targets; the subject and shoe provide the comparison points.

Read the creative direction

Details to retain: the influencer’s face, hair, black tee, watch, seated pose, hands and expression; the sneaker’s mesh, panel boundaries, laces and sole; the window, bench, framing and daylight.

What to check: Save the unedited source. Return to it when testing a different request so changes do not accumulate unnoticed.

Edited interpretation: the same streetwear composition with a plum wall and chrome clothing rail
02

The background interpretation.

The new wall colour and rail finish alter the mood. Compare the face, fingers, shoe panels and framing too: requesting preservation does not guarantee that every detail remains identical.

Read the creative direction

Change only the rear charcoal plaster wall to muted plum plaster and the cobalt clothing rail to brushed chrome. Retain the influencer, outfit, hands, sneaker, bench, glass-block window, plant, jackets, pose, framing and lighting. Do not add text or extra objects.

What to check: Inspect matching areas at the same scale, especially the fingers, lace path and shoe sole. Keep the version only if it meets the actual brief.

Illustrative artwork created outside FanPro for these creative studies. Product props are fictional. The briefs are starting ideas; results in FanPro depend on your inputs and selected Model.

WATCH THE EXAMPLES

One review, across two settings.

The sneaker review begins in the charcoal studio and continues in the plum setting. Watch how the product and performance connect the two parts.

0:27

One review. Every angle.

A scripted AI fashion influencer reviews a sneaker in two joined parts, moving from a charcoal studio to a plum setting for the second part.

Read the transcript

Right, let's actually look at this one. Ivory mesh through the upper, grey suede on the panels. You can see exactly where they meet. Cream sole, pretty chunky, and the stitching's clean the whole way around. Shape's the real thing, though. Look at that side profile. One more thing on this one, the panels aren't just stitched flat, they're layered. See that shadow line running through, that's where the depth comes from. Anyway, that's the shoe.

This joined video is a creative follow-up to the still-image edit. The cut between settings does not demonstrate a video background-edit tool.

AI-generated creative examples. The newly supplied clips use image references and scripted dialogue; they were produced outside FanPro.

FROM IDEA TO FIRST RESULT

Make the edit specific enough to evaluate.

01

Choose the strongest source

Use an image with a clear face, readable clothing and the composition you want to retain. A poorly resolved hand or product label is harder to judge after several changes.

02

Separate keep from change

Write the requested change first, followed by the details that should stay recognisable. For a new background, name the location and light while retaining the subject’s pose and wardrobe.

03

Edit and compare

Open Edit Image, add the source image and select the model and reference inputs available there. Compare the generated version with the original before deciding whether another edit is needed.

Shape your creative brief

One source. One deliberate change.

This is a planning tool. Copy your brief into the studio, add the required inputs and choose the available settings there. No generation or automatic transfer happens here.

WHAT TO LOOK FOR

A successful edit preserves what matters.

Identity drift

Compare the eyes, face shape, hairline and expression at the same crop. If these changed unexpectedly, simplify the request and try again from the original.

Lighting and edges

A new setting needs believable light on the subject. Check hair edges, contact shadows, reflections and colour casts before selecting the result.

Product and clothing details

Inspect labels, closures, patterns and accessories. A prompt is guidance, not a guarantee of exact product or garment fidelity.

THE DETAILS, EXPLAINED

The details, explained.

Describe the new setting in Edit Image and specify the subject details you want to retain. Review the result for edge, lighting and identity changes.

EXPLORE THE NEXT STEP

Keep the workflow moving

Open Edit ImageExplore image creationAnimate the selected image