The AI Upscale Trend: How I Brought "Titanic" Footage Back to Life
That effect from the reel where old footage suddenly looks like 4K. Here's how to recreate it.
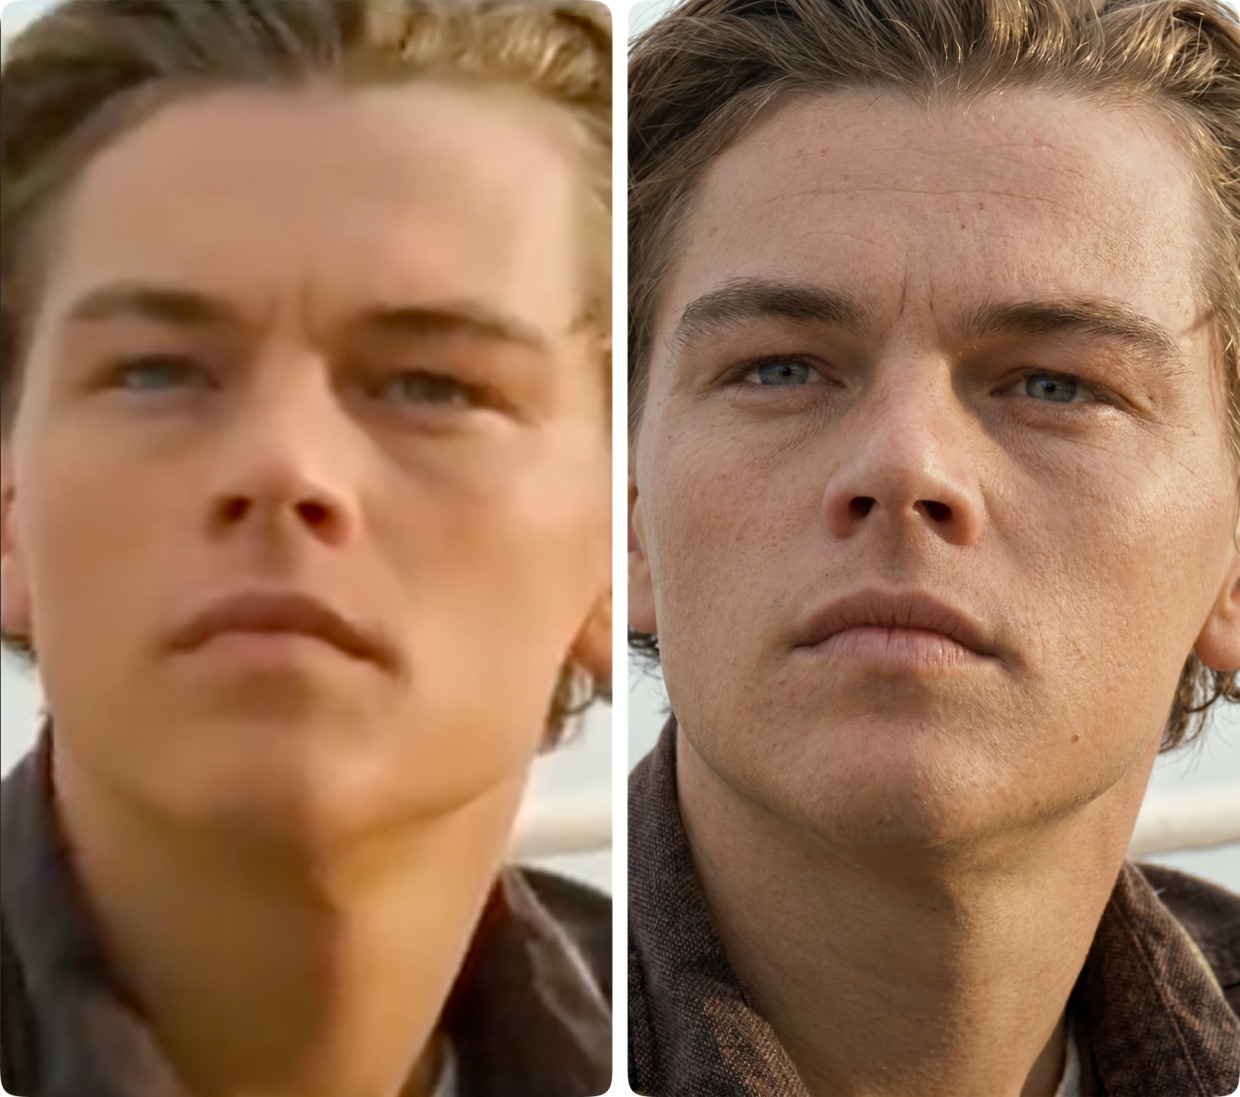
If you're here, you probably saw the reel where a famous "Titanic" clip suddenly turns razor-sharp in the final seconds, like the movie was reshot yesterday. That's AI upscaling, and right now there's a whole trend built around it. No Photoshop, no manual editing, it was all done by AI on FanPro Studio. Below is the full process, step by step, so you can recreate it with your own video.
What the Trend Is About
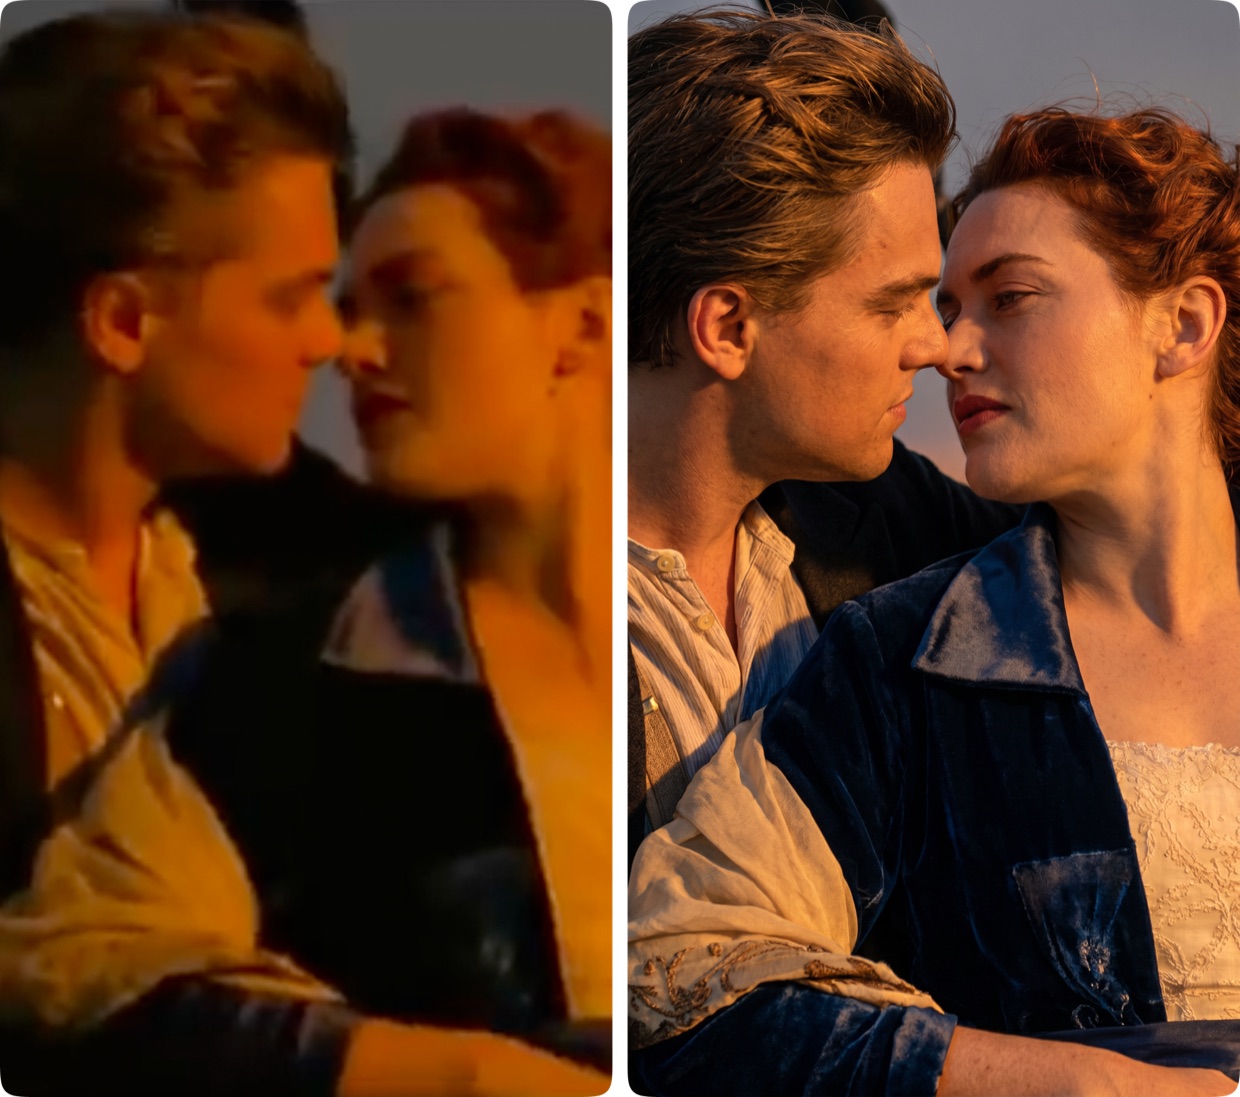
You take a recognizable old clip: a movie, a music video, archive footage. The last few frames are run through AI upscaling and come out crisp and detailed. In the edit this creates a "wow" moment: the video seems to come to life right in front of the viewer. The contrast with the older frames at the start is the whole point.
Tip. Go for close-ups: faces, expressive moments. That's where the difference in quality is most visible, which means a stronger effect.
What You'll Need
A FanPro Studio account, a video editor (CapCut, Premiere, whatever you're used to), and a clip you want to work with. I picked the most iconic "Titanic" footage, everyone recognizes it, so the effect reads instantly.
Bring Old Footage Back to Life in 7 Steps
Step 1. Choose the Frames to Upscale
AI upscaling in FanPro works with images, not full video. So you need to pull individual frames out of the clip.
I didn't upscale the whole video, only the last frames of the clip, the ones I wanted to emphasize. That's the trick: the viewer watches the familiar old footage, and in the finale it suddenly "comes alive". Export the frames you need from the clip, then we work with each one separately.
Step 2. Open the Right Mode
In FanPro, go to the Images section and select the Studio Pro Edit mode at the top. Then switch to the Image Edit tab, this is where you can upload your own image and transform it with a text prompt.
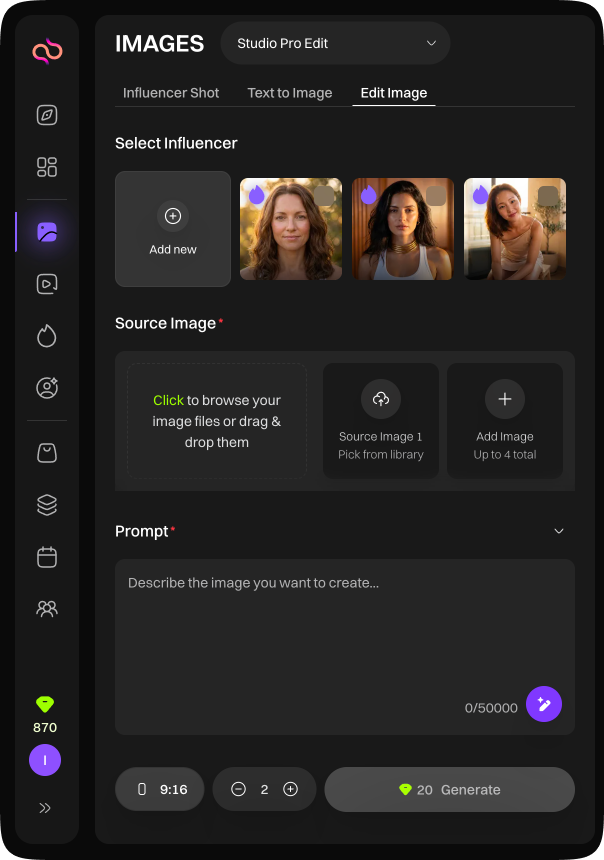
You can ignore the Select Influencer block, it's for other use cases. The two fields that matter are below: Source Image and Prompt.
Step 3. Upload the Frame
Drag a frame into the Source Image block, or click to pick a file. You can upload up to 4 images at once.
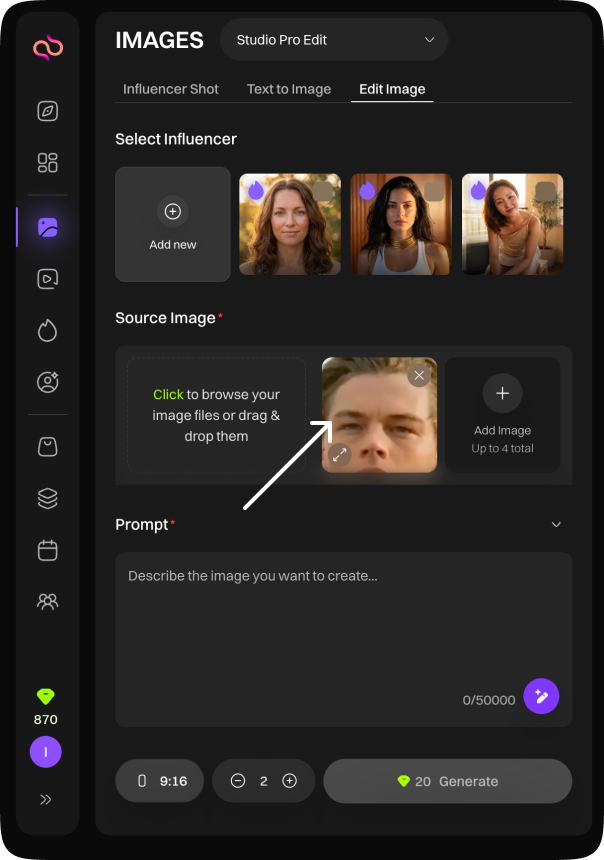
You can see the source frame is blurry and low quality, that's fine, this is exactly the kind of material upscaling is built for.
Step 4. Paste the Prompt
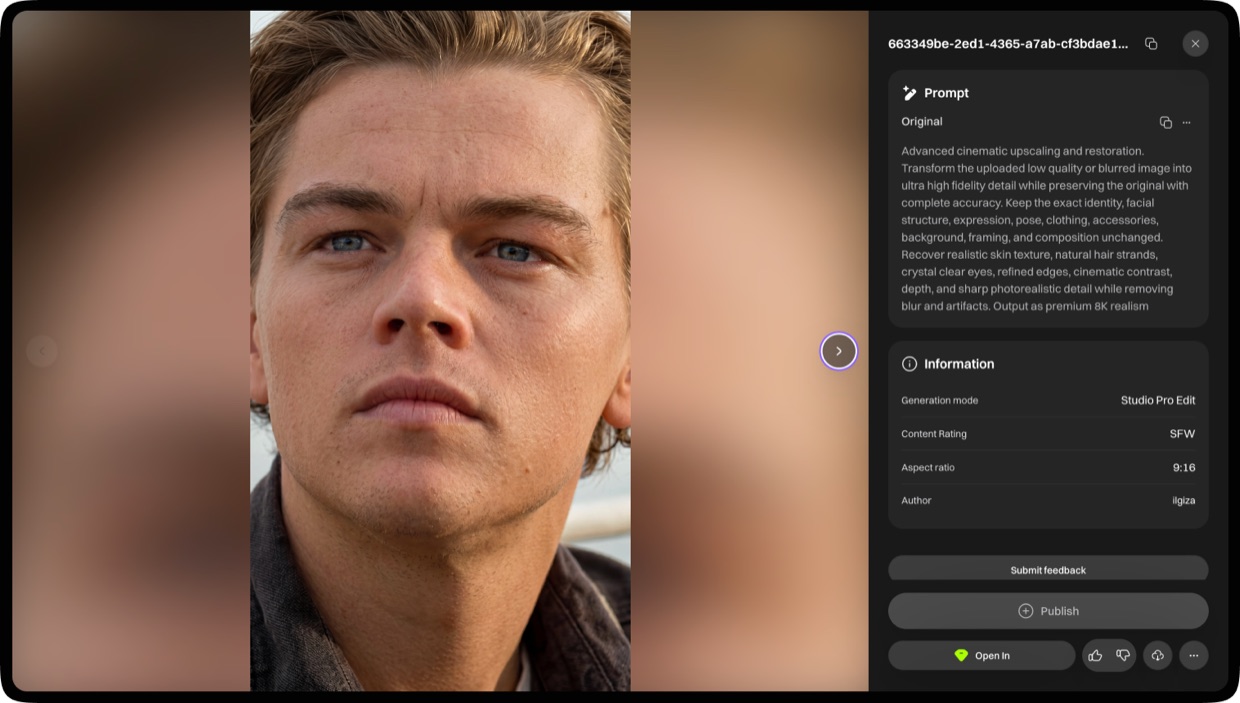
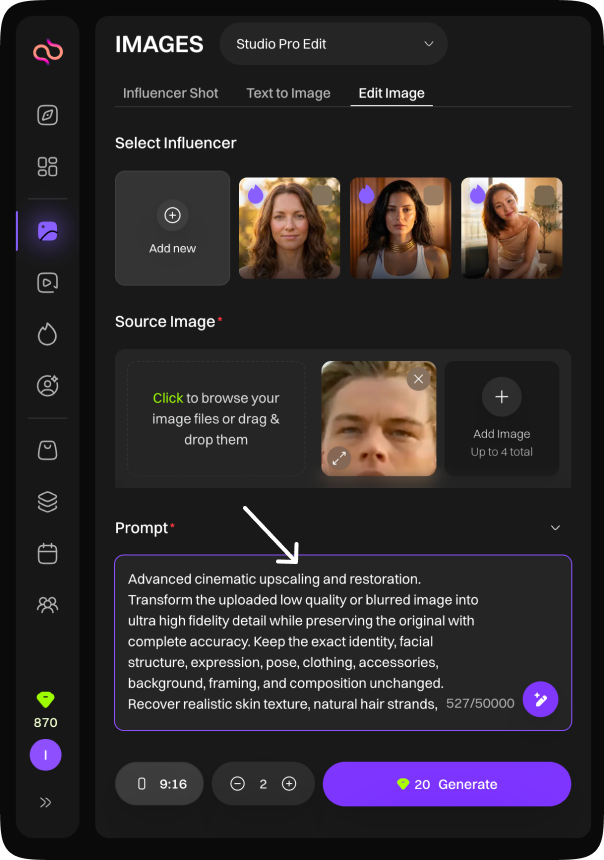
Paste your text into the Prompt field, this is the instruction for the AI. The main job of the prompt: boost the detail, but invent nothing on its own, keep the face, pose, clothing, and background exactly as in the original. Here's the prompt I used:
Advanced cinematic upscaling and restoration. Transform the uploaded low quality or blurred image into ultra high fidelity detail while preserving the original with complete accuracy. Keep the exact identity, facial structure, expression, pose, clothing, accessories, background, framing, and composition unchanged. Recover realistic skin texture, natural hair strands, crystal clear eyes, refined edges, cinematic contrast, depth, and sharp photorealistic detail while removing blur and artifacts. Output as premium 8K realism.
Why the prompt is written this way. The key phrases are preserving the original and keep the exact identity unchanged. Without them the AI starts "improving" the face its own way, and the character no longer looks like themselves. For this trend it's essential that the frame stays recognizable: it's still Leo from "Titanic", just in crisp quality. You can copy the prompt as-is, it's universal for any video.
Step 5. Settings and Generation
Set the parameters at the bottom. I used a 9:16 aspect ratio, vertical for Reels. Number of results: 1 or more, so there's something to choose from. The credit cost is shown on the right. Hit Generate and wait.
Step 6. Check the Result
The finished frame opens in compare mode: the blurry original on the left, the upscaled result on the right. The difference is immediate: skin texture appears, individual hair strands, crisp eyes, and the background stops "smearing".
Download the version you like with the download button. Repeat steps 3 to 6 for the rest of the frames you want to "bring to life".
Step 7. Edit the Video
Now the video editor. Assemble the clip: keep the original old frames at the start, place the upscaled ones at the end. That transition from blurry to sharp is exactly what creates the trend effect. Keep the original order and frame rate so the video runs smoothly.
Recreate any viral trend with FanPro Studio's AI creation tools
Explore the AI Video Generator ›Try It Yourself
The whole process: pick frames from the clip, upload them to FanPro, paste the upscale prompt, generate, then edit so the sharp frames land in the finale. One frame takes about a minute to process, and in the edit you get the exact effect you came here for.
The prompt from Step 4 copies as-is. Take any recognizable clip: a movie, a music video, old footage, and recreate the trend on FanPro Studio. If it works out, drop your result in the comments under the reel.
Author: Ilgiza · Instagram: @ilgizazaza